

A retail opening done well is memorable. Checkout works from the first transaction. Staff are confident. Inventory is accurate. The locations that hit that mark tend to share one thing: setup done in the right order, with enough runway before opening day to verify it worked.
The most common issues—devices that haven't synced, payment terminals that won't connect, staff locked out of the app—are preventable with the right sequence and timing. Each one generates support contacts and erodes confidence during the most critical moments of a store's launch.
The Shopify POS launch checklist in the Help Center covers what to configure: products, payments, taxes, hardware, staff accounts. This guide covers the part the checklist doesn't: when to do each step, what to verify before you open, and what to expect at each stage so nothing catches you off guard on opening day.
The launch countdown
The difference between a smooth opening and a launch-morning scramble is planning. Here's the timeline that works.
2-3 months out: Planning, hardware, and partner engagement
This timeline assumes you already have a Shopify store set up online and are adding a retail location. It's scaled for store owners with a handful of locations. If you're migrating from another POS system or e-commerce platform, launching 10+ locations at once, or running a large enterprise rollout, allow additional time for each phase and consider working with a Shopify Partner or your account team.
Order hardware early. Shipping takes two to three weeks, but bulk orders or procurement approvals can extend that. Having hardware in hand unlocks every subsequent step—network setup, peripheral testing, and if applicable, MDM enrollment, can all move forward in parallel.
For multi-location rollouts, consider having hardware shipped to a central location—your office or IT team—for configuration before distributing to stores. This lets your team enroll devices in MDM, install the POS app, configure WiFi profiles, and verify everything works before the hardware reaches the store floor. For single-location setups, shipping directly to the store is fine.
If your business uses an ERP, accounting software, order management system, or other third-party integrations, engage those partners now. Confirm their timeline for connecting to Shopify, any data requirements on your side, and whether they have experience with Shopify POS integrations. Starting these conversations early gives everyone enough runway to plan, build, and test—so that by the time you're configuring your admin and setting up devices, the integration work is ready to plug in.
Before you touch the Shopify admin, get the basics sorted. Make sure your Shopify POS plan supports multiple locations if you need it. Figure out how you'll split inventory across locations, check your hardware requirements.
Two things to check early: Confirm your devices meet the minimum OS requirements (older devices that can't run current operating system versions may have performance issues), and verify the location has reliable internet (minimum 10 Mbps recommended).
Your hardware list is in the Help Center checklist. For multi-location launches or high-traffic stores, keeping spare peripherals on hand is good practice—a backup card reader or receipt printer means a hardware issue doesn't take a register offline while you wait for a replacement.
All Shopify POS hardware is available at hardware.shopify.com.
2-3 weeks out: Admin configuration
Everything in this phase happens in the Shopify admin, not on POS devices. The launch checklist walks through each step: creating the location, configuring taxes and payments, setting up staff accounts, and customizing receipts.
Data migration
If you're migrating from another POS or e-commerce platform, or working with a large catalog, allow four to six weeks for this phase to give yourself time to validate data and confirm everything is set up correctly.
If you're migrating from another POS or e-commerce platform, the order in which you import data matters. Migrate in this sequence:
- Products
- Customers
- Historical orders
- Gift cards
Products go first because they set the hierarchy for order and customer mapping. Customer profiles come next so they can be linked to historical orders during import. Historical order and customer profile imports can be complex depending on data volume, format, and how cleanly data maps between platforms. If you're migrating a large dataset, work with your implementation team, Shopify Support, or a third-party data migration app from the Shopify App Store.
Gift cards go last—store owners often continue selling gift cards on their old system up until launch, so a final push into Shopify immediately before go-live keeps balances accurate. Gift cards can't be edited after import.
If you're replacing an existing POS system, have a plan to decommission it before go-live. Your previous provider may have specific steps for closing out your account, exporting final records, or canceling hardware leases. The goal is a clean cutover—once your Shopify POS location is live, all transactions should flow through Shopify.
To sell and accept gift cards on Shopify POS, enable them in the POS app: go to Settings > Checkout > Payments and activate gift cards. If you're selling physical gift cards, also go to Settings > Products > Gift cards and activate "Issue digital or physical gift cards." See Managing payment methods for POS for details.
Omnichannel setup
Before diving into product setup, make your omnichannel decisions:
- Will this location offer buy online, pick up in store?
- Will staff ship online orders from this location (requires POS Pro)?
- Will you offer local delivery?
Each of these requires additional configuration in the admin, and it's easier to set them up before you start assigning products and inventory to the location.
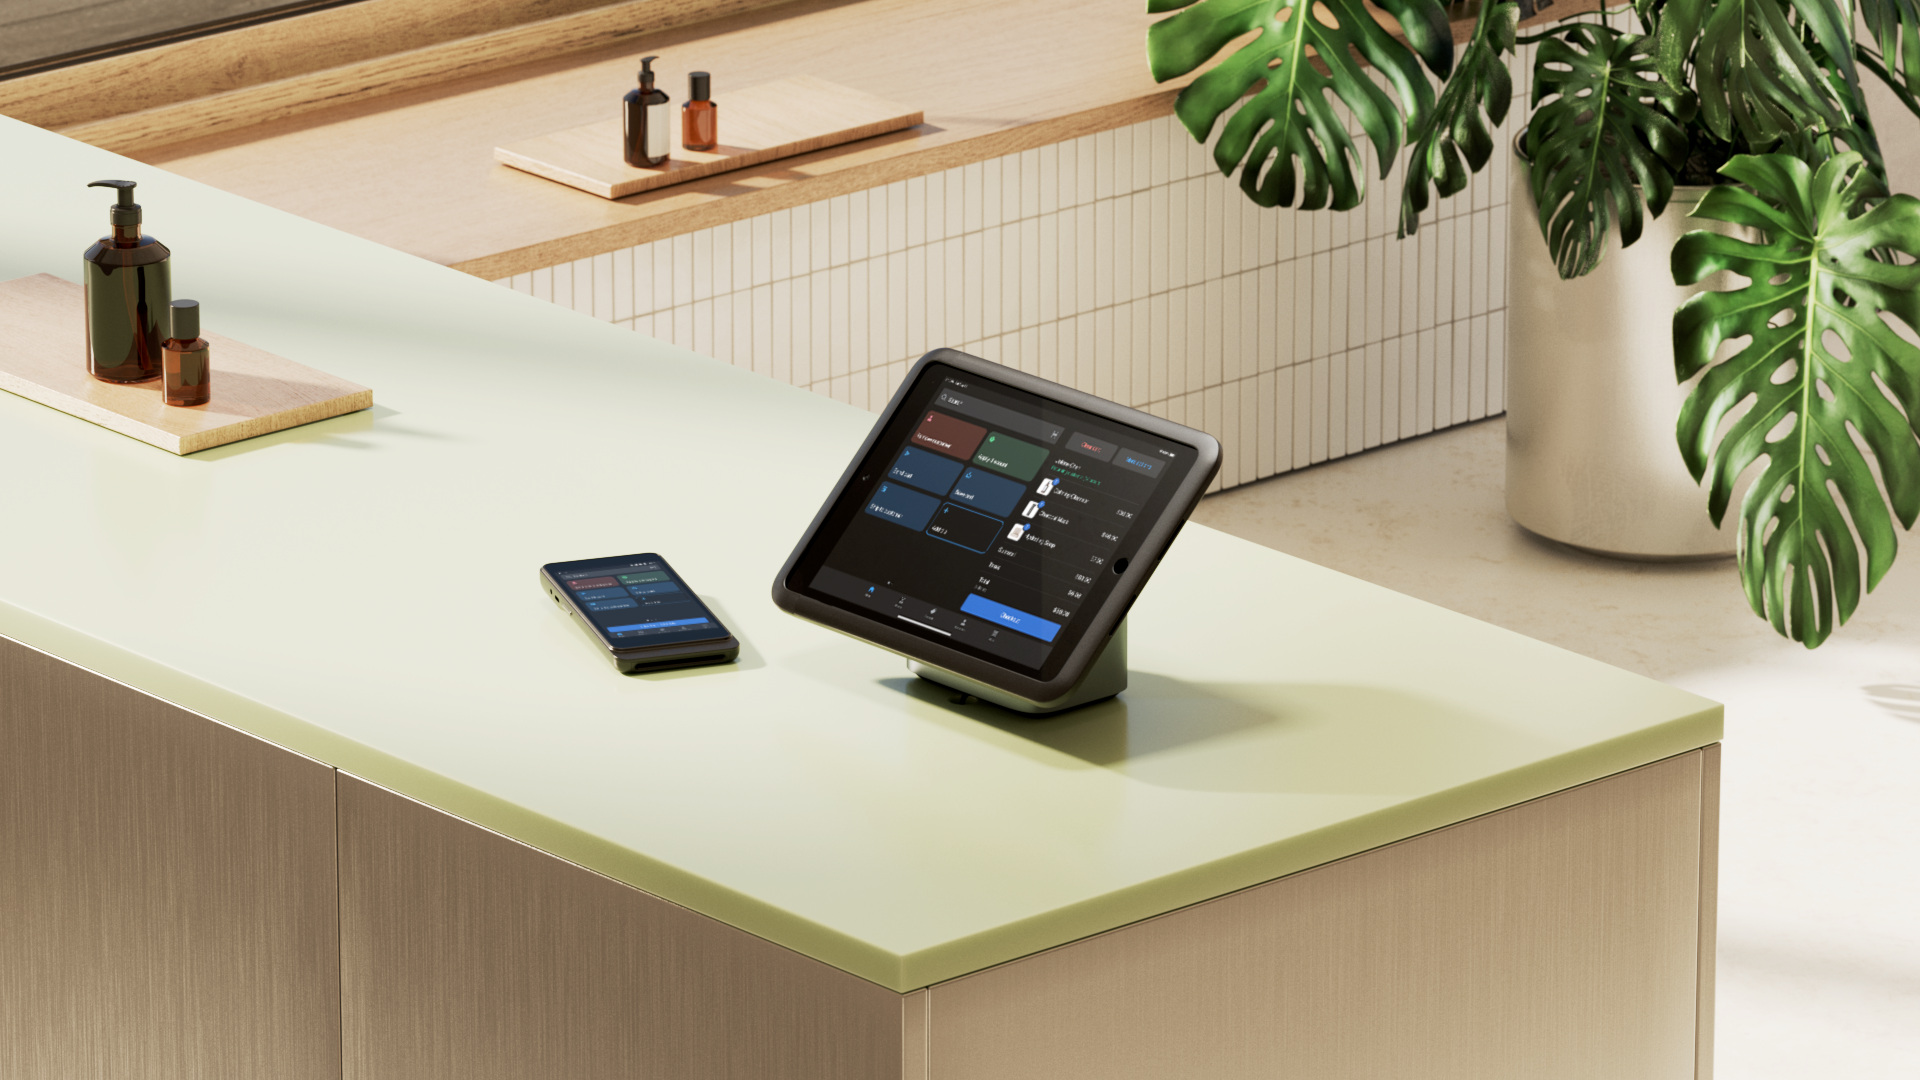
Several POS settings—smart grid layout, lock screen, receipts, and customer displays—can be configured once in the Shopify admin and applied across all locations and devices. Set these up during admin configuration so they're ready when devices come online. See customizing your POS for details.
Products and inventory
This is the most important step to get right before launch. If products aren't assigned to the POS sales channel, or inventory isn't allocated to your retail location, they won't appear as expected on POS devices. Products without inventory at this location will show as "not stocked"—visible but not sellable.
- Make sure products are assigned to the POS sales channel
- Allocate inventory quantities to the new location
- Activate inventory tracking for this location
- Set up stock transfer workflows from your warehouse or other locations—create transfers in the Shopify admin (Products > Transfers), then receive incoming stock directly on the POS device at the destination location
- Verify barcodes and SKUs are correct for all products
If the same products are stocked at multiple locations, each location's inventory is tracked independently. When allocating inventory to your new location, be deliberate about which products you assign and in what quantities, especially if the same SKUs already exist at other locations. See Managing inventory for products from multiple locations for how to assign and adjust inventory across locations.
Start this as early as possible in the admin configuration phase. Don't leave it for device setup week.
While you're in the admin, confirm which account will handle initial device setup—the first login on each new POS device requires a store owner or organization administrator account, not a staff PIN. If that person won't be on-site during setup week, plan ahead.
2-3 weeks out: Network setup
Network configuration is the foundation for a smooth device setup. Complete it before bringing devices on-site so that when your team installs the POS app and connects peripherals, everything connects as expected. A store using simple consumer WiFi works fine. A store with a managed enterprise network needs a few specific settings in place first.
Before you install the POS app or connect any hardware, complete the full network setup for Shopify POS. The most critical steps:
- Firewall allowlist: Add all required domains (15+ including shopify.com, stripe.com, and bbpos.com—the full list is in the network guide)
- Required ports: Open 4443, 8080, 27000, and 27001 for POS Terminal
- Geographic IP filtering: Disable it if your firewall has it. POS services are hosted worldwide.
- Same network and subnet: All POS hardware should be validated on-site with your IT team on standby. Some devices—particularly WiFi printers—must be on the same subnet or IP range as your POS tablets to communicate correctly. If you use VLANs or network segmentation, your network administrator can verify device placement during setup. For full configuration details, see the network setup guide.
- WiFi printers: Confirm they support 2.4GHz. Some printers don't connect on 5GHz.
- POS Hub: If you're setting up new hardware, the Shopify POS Hub connects your peripherals (card readers, printer, scanner, cash drawer) to your iPad over a single wired USB-C or Lightning cable, providing a reliable, single-cable connection for all your peripherals. Available at hardware.shopify.com.
For permanent retail locations, aim for network redundancy—a secondary internet connection or failover router keeps your store selling if the primary connection drops. Cellular backup is a useful safety net for special events, but it's not a substitute for a reliable primary and secondary connection.
If you run into connectivity issues during setup:
- Test with a cellular hotspot first. If POS works on cellular but not your store's network, the issue is your network configuration, not the device.
- Check POS app permissions on iOS: Go to iPad Settings > Shopify POS and confirm Location is set to "While Using," Bluetooth is on, Local Network is on, and Background App Refresh is on.
- If using POS Terminal: Verify the iPad and Terminal are on the same network. Enterprise networks that isolate devices from each other (client isolation) will block the connection.
- Ask your network administrator to review the full network setup guide, including the Stripe domain allowlist, which is separate from Shopify's and often missed.

Matthew Henry/Burst
1-2 weeks out: On-site setup and testing
This is where the timeline matters most. Plan to set up your devices at least one week before launch. The setup itself takes a half day for a single register or a full day for multiple registers, but you want a buffer between setup and opening so you have time to verify everything works, troubleshoot any issues, and handle hardware exchanges if something arrives damaged or incompatible.
If you have a separate IT team, most device configuration can be done at your office before shipping to the store. Install the POS app, configure WiFi, and let the catalog sync before the device arrives at the location. Unbox and test all peripherals (card reader, receipt printer, barcode scanner, cash drawer) at the same time so you know everything works before it reaches the store. The store team then only needs to power on, connect peripherals, and verify.
If your business has Standard Operating Procedures (SOPs) for checkout, returns, or inventory, review and update them for Shopify POS before you start testing. Use your everyday workflows as a test plan—run through each one on the device to confirm it works as expected.
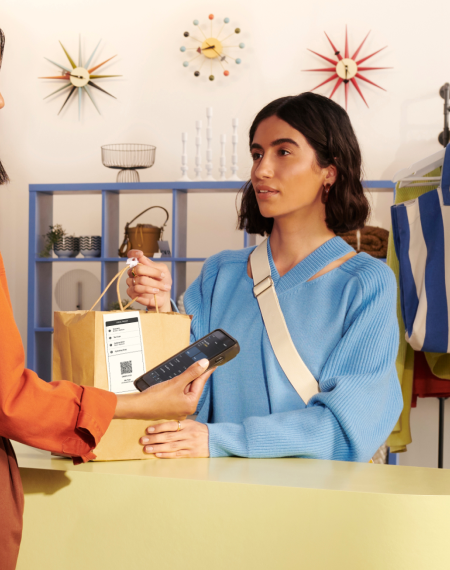
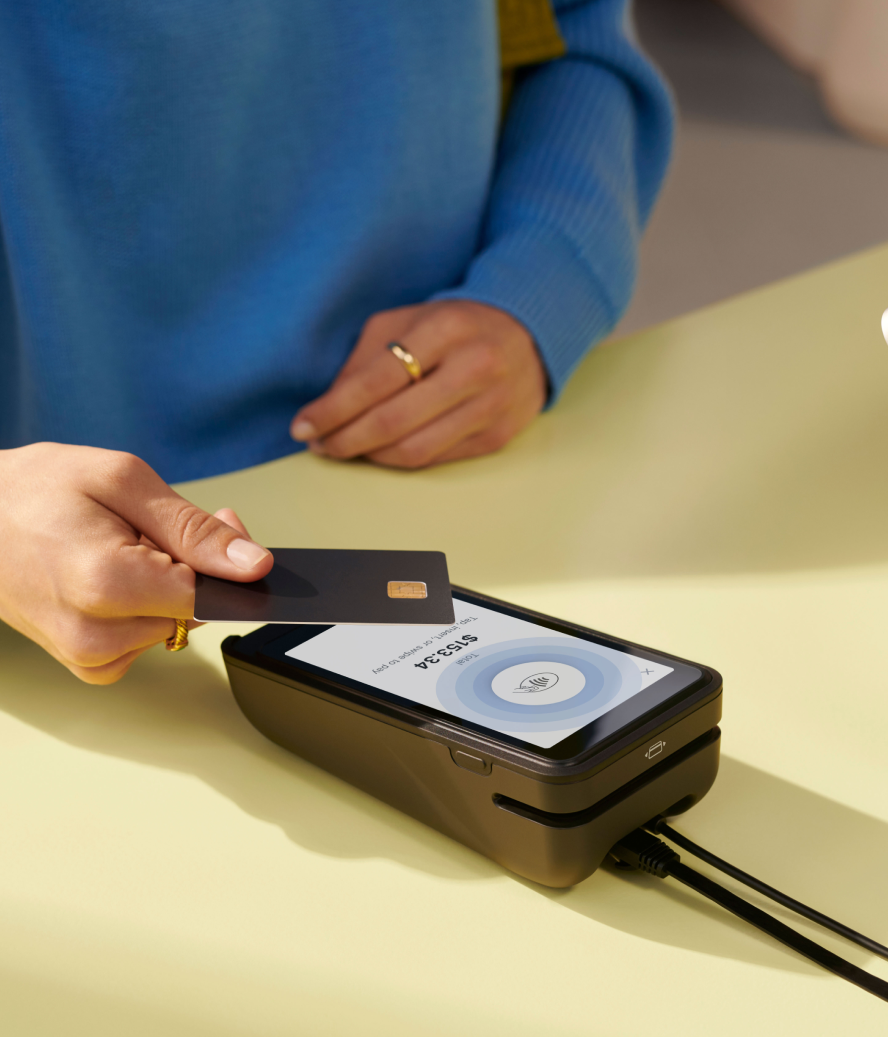
Once devices are synced and peripherals are connected, verify the full checkout flow works:
- Create a small custom sale (e.g., $1) and process it as a credit card payment using your card reader
- Confirm the printed receipt matches your intended settings
- Refund the transaction immediately (refunds processed within 15 minutes don't incur processing fees)
That's it for card testing. One successful card transaction and refund confirms the reader, the payment connection, and the receipt printer are all working. Keep test transactions to a minimum—all transactions, including cash and manual payments, count toward your store's order volume.
Before launch, verify that your discounts and pricing display correctly on the POS app. Test any automatic discounts, discount codes, and sale prices to confirm they apply as expected. If you use third-party apps that integrate with Shopify POS (returns, loyalty, clienteling), test those workflows on the device as well—confirm they load, sync data, and complete their core actions without errors.
If this is your first location on Shopify, also verify your payout configuration at Settings > Payments in the Shopify admin. Additional locations inherit the same payment and payout settings, so this step is only needed once.
The sync gap: Why timing matters
After logging in to a new device and selecting the location, the POS app downloads your full product catalog.
How long this takes depends on your catalog size and network speed. Stores with a few hundred products sync in minutes. Stores with thousands of products may take considerably longer, so plan accordingly.
You should verify the sync is complete before relying on the device. Check Connectivity > Data synchronization in the POS app to confirm.
What to verify after sync:
- Search for a product by name: Does it appear?
- Scan a barcode: Does the product come up?
- Check inventory counts for a few products: Do they match what you set in the Shopify admin?
- Check Connectivity > Data synchronization in the POS app: Is the sync complete?
Note: The first person to log in to a new POS device (or a device that's been reset) needs a store owner or organization administrator account. Any staff account with admin permissions and the "Set up new or updated POS devices" role can also complete this step. Regular staff PINs don't work until after this initial setup. If your IT team handles device setup across multiple locations, a dedicated provisioning account simplifies the process.
Note: If you use MDM with a large catalog: Shopify POS keeps the screen active during the catalog sync to prevent interruptions. However, if your MDM enforces a device auto-lock policy (passcode required after a set number of minutes), that policy can override the app and lock the device during a long sync. If you have a large catalog (5,000+ products) and a strict auto-lock timeout, consider setting a longer timeout during initial device provisioning, or have someone available to unlock the device if it locks mid-sync.
Staff training that sticks
Train staff after the system is fully set up and tested so they can practice on the actual devices with real products loaded. Don't train before hardware is connected.
Important: Shopify POS doesn't have a demo mode. Every transaction processed in a live environment is a real order—including cash and manual payments. During training, walk staff through the checkout flow using the actual interface, but keep processed transactions to a minimum. When you do need to process a practice transaction, use a small-value custom sale and refund it immediately.
Schedule a dedicated session of two to three hours when the store isn't open to customers. Staff learn POS by doing, not watching. The Help Center training guide lists the core skills to cover: processing sales, payments, returns, exchanges, discounts, gift cards, and cash register management.
What the training guide doesn't cover that makes a real difference:
- What to do if the internet goes down: Set up and enable offline mode before launch day, and train staff on how it works. Having a backup internet option available is also good practice.
- How to reconnect peripherals: Card readers and printers can lose their Bluetooth or WiFi connection. Staff should know how to re-pair them without calling IT. If you're using the Shopify POS Hub, wired peripherals reconnect automatically—no pairing needed.
- Who to contact for help: Designate an on-site lead who can escalate issues. Make sure every staff member knows who to contact and how before launch day—include this in your training session.
- The email cart feature: If a shopper browses but doesn't buy, staff can email them a cart preloaded with the products they looked at. If the shopper completes the purchase online, the store and staff member get credit for the sale.
- Keep devices focused: Close non-essential apps (browsers, media, games) before shifts. POS devices running background apps use more memory and may affect POS performance during checkout. Business apps your team relies on alongside POS (e.g., returns, scheduling) are fine to keep running.
For larger teams, consider making training an event. Order food, walk through everything together, and let people practice until they're comfortable. A focused group session is faster and builds more confidence than one-on-one walkthroughs.

Matthew Henry/Burst
Launch day operations
Opening
- Power on all devices and verify they connect to WiFi
- Open the POS app on each device, confirm the correct location is selected, and verify the product catalog is loaded and searchable
- Verify all peripherals are connected and responding: Card reader paired, receipt printer online, barcode scanner scanning, cash drawer opening
- Start the cash tracking session and enter the opening float
- Confirm staff are logged in with correct permissions
- Confirm on-site lead or on-call support is available
During the day
- Monitor for hardware disconnections or connectivity issues
- Check in with staff throughout the day
- Verify orders are appearing in the admin with the correct location
- Note any issues for follow-up
Closing
- Close the cash tracking session and reconcile the register
- Review the day's sales and identify any discrepancies
- Note any staff training gaps to address
Your first week
The first week is about confirming everything works under real conditions.
- Review daily sales reports for accuracy
- Monitor inventory accuracy and investigate any discrepancies
- Check Finances > Payouts in the Shopify admin to confirm payouts from the first days of sales are processing correctly
- If you use third-party systems (ERP, accounting software, order management), verify that data is flowing correctly after your first day of sales—check that orders, inventory adjustments, and customer records are syncing as expected
- Check for hardware or connectivity issues
- Gather staff feedback on operations and pain points
- Adjust the smart grid layout based on actual usage pattern
- Refine inventory allocation based on early sales velocity
- Document lessons learned for future location launches
Schedule your first physical inventory count within the first month of opening. This establishes a baseline—if quantities drifted during migration, setup, or the first days of selling, an early count catches it before discrepancies compound. If you're migrating from another POS or e-commerce platform, input your final inventory counts the day before go-live so quantities are accurate from day one.
Note: If you run an inventory count while a stock transfer is in progress, some products may temporarily show zero. Always count what's physically on the shelf—the quantity you enter replaces the system value entirely.
Scaling to multiple locations
If you're opening several locations, a phased approach often reduces risk. Many store owners find it helpful to start with one location, stabilize it over at least one week, then expand in waves. That said, some retailers—especially those with experienced teams or tight platform migration timelines—successfully launch all locations at once. Choose the approach that fits your team's capacity and how many locations your support team can actively manage at once.
Pilot first
Choose a location that represents your typical store—not your highest-volume flagship (too much risk if something goes wrong) and not your quietest location (won't surface real issues). Set it up using the full process above, then give it at least one week before expanding.
During that week, verify:
- Payment processing works correctly across all payment types
- Inventory counts are accurate and syncing properly
- Sales reports show the correct location and data
- Staff are comfortable with the workflows
Update your training materials and troubleshooting guides based on whatever comes up. Don't expand until the pilot is stable—anything you're still working through will carry over to every location in the next wave.
Expand in waves
Group remaining locations into waves of two to five, scheduled at least one week apart. A regional approach often works well—launching nearby stores together means your support team can physically visit if issues come up. Even large retailers benefit from keeping waves tight (2-4 weeks total) to avoid running multiple systems simultaneously.
Standardize your hardware
Choose one device type (iPad or Android) and one card reader model for all locations. Consistent hardware means staff can troubleshoot across locations and your IT team supports one configuration. If you have five or more locations, consider mobile device management (MDM) to manage devices centrally.
Payment Terminals and POS Hubs also receive periodic firmware updates. Terminal updates install automatically overnight when connected to power and Wi-Fi. For POS Hub, check for updates in device settings. Keeping all devices on the latest firmware is important—updates include security patches, performance improvements, and compatibility fixes that ensure your terminals and hubs continue to work reliably with the POS app. Build firmware checks into your regular device management routine alongside POS app updates so your entire hardware stack stays current.
Pre-launch checklist: what to verify before you open
Before opening day, walk through each item and confirm it works:
- Products appear on the POS app and are searchable. If not: products not assigned to POS channel, or sync not complete. Fix: Set up devices 1+ week before launch.
- Inventory counts match what you entered in the Shopify admin. If not: inventory not allocated to location. Fix: Set up inventory tracking 2+ weeks before launch; input final counts the day before go-live.
- Card payments process successfully. If not: payment gateway not configured, or card reader not paired. Fix: Test transactions 1+ week before launch.
- Tax rates are correct for this location. If not: location address incomplete. Fix: Enter the full address including postal code.
- Receipt printer produces receipts. If not: printer not on the same network or subnet as the POS device. Fix: Test during on-site setup phase.
- All staff can log in with their PINs. If not: accounts not created, or wrong location selected. Fix: Create accounts and test PINs during training.
- Staff PINs work on each new device. If not: initial admin login not completed. Fix: Store owner or admin must do the first login on each new device.
- Payments go through on your store network. If not: firewall blocking required domains or ports. Fix: Follow the full network setup guide.
Next steps
- Print the Shopify POS launch checklist for the step-by-step configuration steps
- Follow the Shopify Retail Roundup to stay current on new POS features
- Read How to Do Inventory Counts with Shopify POS to plan your first physical count
- Read How to Replace a POS Device for what to do if hardware fails
- Read Managing POS Devices Across Multiple Locations for MDM guidance
Opening a new retail location FAQ
How long before opening should I set up POS devices?
At least one week. Product catalogs, inventory, and settings need to sync to POS devices, and you want time to troubleshoot any issues or handle hardware exchanges before customers arrive. For stores with large catalogs (thousands of products), the initial sync alone can take several hours.
Do I need a store owner to set up each device?
For the first login on each device, yes. The initial device setup requires a store owner or organization administrator account. After that first login, staff can use their PINs.
What's the minimum internet speed for Shopify POS?
10 Mbps is the recommended minimum. Wired connections via Ethernet and POS Hub are more reliable than WiFi. If your location has an enterprise firewall, follow the full network setup guide.
How many locations should I launch at once?
Many store owners find it helpful to start with one, stabilize it over at least one week, then expand in waves of two to five locations. That said, experienced teams with tight timelines can successfully launch all locations at once.
Is there a setup checklist I can print?
Yes. The Shopify POS launch checklist in the Help Center covers every configuration step and is designed to be printed or downloaded as a PDF. This guide adds the timeline and operational layer on top of that checklist.